 Skip to content
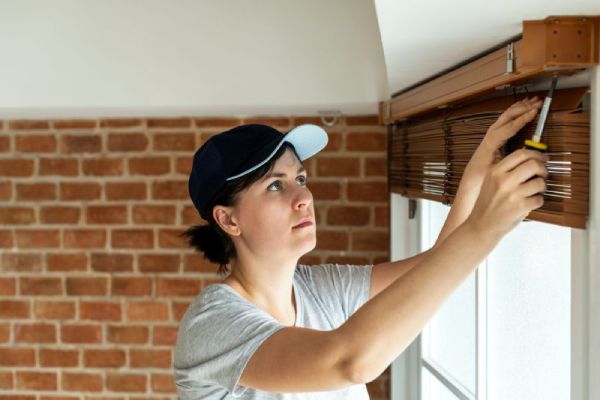
TABLE OF CONTENTS
ToggleIntroduction: How to take down blinds
Starting to renovate your house? Let’s talk about window coverings, a game-changer. Have you ever considered the ability to remove blinds effortlessly? Learn how to take down blinds like a pro, whether they are Cordless, roller, or Roman. From gathering the right tools to ensuring a smooth removal! Join us as we walk you through the steps in this comprehensive guide.
Why is knowing how to take down blinds important?
Knowing how to take down blinds allows you to replace your window coverings whenever you choose. It allows you the flexibility to experiment with various looks and materials, making it simple to update the aesthetic of your house. Additionally, knowing how to take down blinds properly ensures that you can easily reinstall or reuse them in the future.
What type of blinds do you have at home?
1. Vertical Blinds:
Vertical blinds consist of individual vanes or slats that hang vertically from a headrail. It is common to find them in large windows or sliding glass doors.
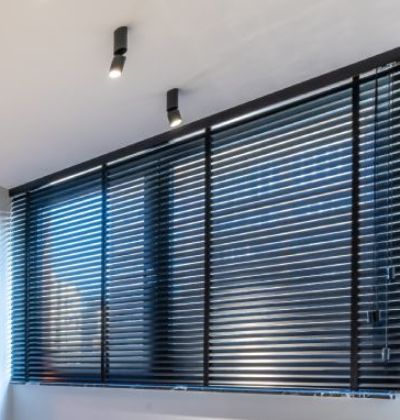
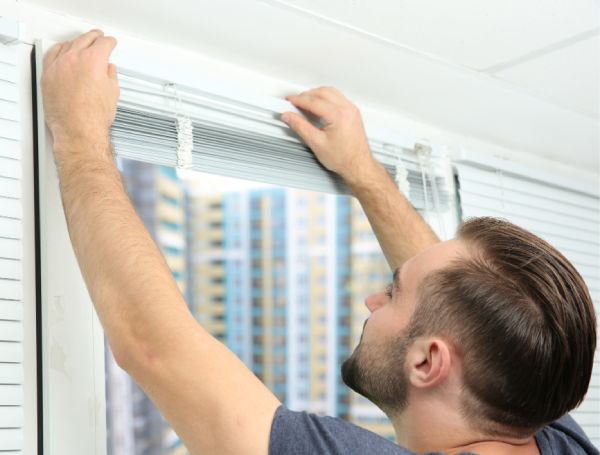
2. Horizontal Blinds (Venetian Blinds):
Venetian blinds feature horizontally stacked slats that can be raised using 2 cords or tilted to change their position.
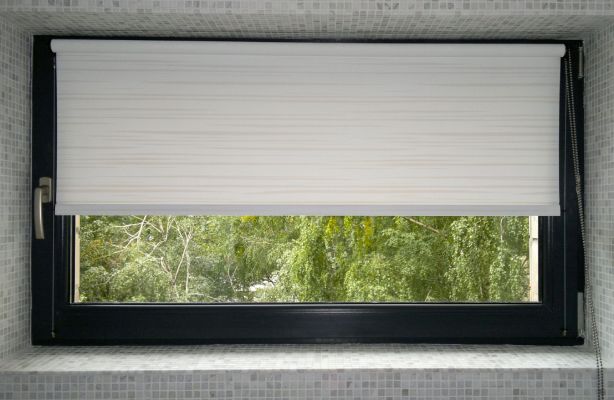
3. Roller Blinds:
Roller blinds are famous for their straightforward design and practicality. They consist of a single piece of fabric attached to a tube and a spring-loaded mechanism.
4. Roman Blinds:
Roman blinds have a classy and timeless appearance. These blinds are crafted from fabric panels that neatly fold up when lifted.
5. Mini Blinds:
Mini blinds are similar to horizontal blinds but have narrower slats. Ideal for smaller windows, they present a neat and clean look. The tilting and lifting mechanisms make it easy to control light and privacy.
6. Cellular Blinds (Honeycomb Blinds):
These blinds have a unique honeycomb design that creates areas of air, offering insulation and energy efficiency. They’re great for keeping your home comfy and well-regulated.
7. Motorized Blinds:
Motorized blinds are equipped with an electric motor, allowing you to control them remotely with a remote control or through home automation systems.
Preparations before removing blinds

Before you begin removing your blinds, there are a few preparations to consider. Start confirming you have all the essential tools and materials readily available. Moreover, this will make the process smoother and more efficient. Additionally, prioritize your safety by taking precautions such as wearing gloves and protective eyewear.
Tools and Materials Needed
- Screwdriver
- Pliers
- Drill (optional, depending on the blind installation)
- Replacement parts (if required)
- Clean cloth or duster
In addition to these tools, there are a few additional materials that can facilitate the removal process:
- Plastic bag or storage container for small parts
- Painter’s tape (to protect the walls or surrounding areas)
- Drop cloth or sheet (to protect the floor)
- Gloves and protective eyewear (for safety)
Note: Locate these tools at your nearby hardware store or explore a wide selection of tools from online retailers for blind removal. Opt for high-quality tools to enhance overall efficiency.
How to take down blinds from windows?
Step1: Inspect your Blinds
Make sure your blinds are in good shape before taking them down. This will help you plan any necessary repairs or replacements.
1. Inspect Mechanism: Check for wear, rust, or malfunctions in the blind mechanism, including the tilting mechanism, cords, and chains.
2. Identify Issues: Spot concerns like bent slats, broken cords, or malfunctioning tilt mechanisms during the inspection.
3. Bent Slats or Rails: Straighten or replace any bent pieces to maintain appearance and functionality.
4. Broken Cords or Chains: Easily replace or repair damaged cords or chains with simple steps.
5. Malfunctioning Tilt Mechanism:
Repair or replace a faulty tilt mechanism using provided instructions or replacement parts.
Note: For complex repairs or replacement parts,contact the manufacturer or seek professional blind repair services.
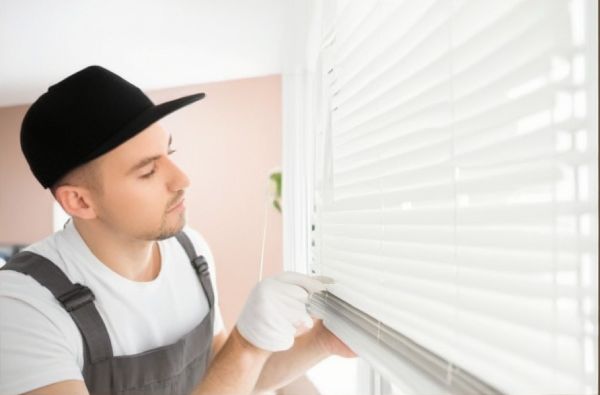
Step 2: Removing the Mounting Brackets
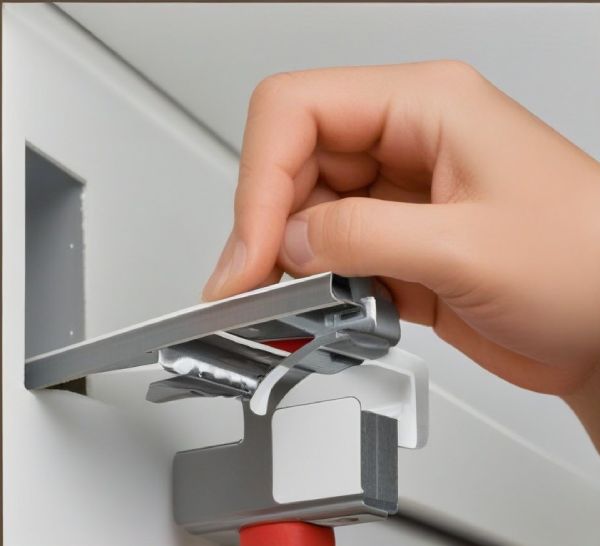
Knowing how to remove blinds safely from the mounting brackets is a crucial step in blind removal troubleshooting. Follow these steps:
- Start by using a flat-head screwdriver to remove any visible screws from the brackets.
- If the screws are tightly secured, use a drill with a Phillips-head bit to loosen them.
- Once the screws are removed, gently pull the brackets away from the wall or window frame.
- Be sure to hold onto the blinds as you remove the last screw to prevent them from falling.
Step 3: Detach the Blinds from the Headrail
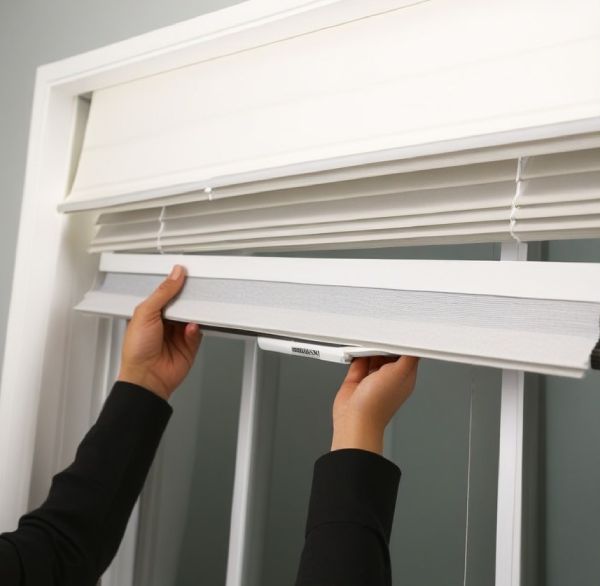
Next, you will need to detach the blinds from the headrail.
- Locate the small plastic tabs on the headrail. These tabs secure the blinds in place.
- With a steady hand, gently push or squeeze the tabs to release the blinds.
- Slowly release the blinds out of the headrail. Take your time to avoid damaging the blinds or the surrounding area.
Step 4: Remove the Headrail
Once the blinds are detached, carefully slide out the headrail from its brackets to avoid unnecessary stress on the mechanism.
Step 5: Cleaning and Storing Blinds
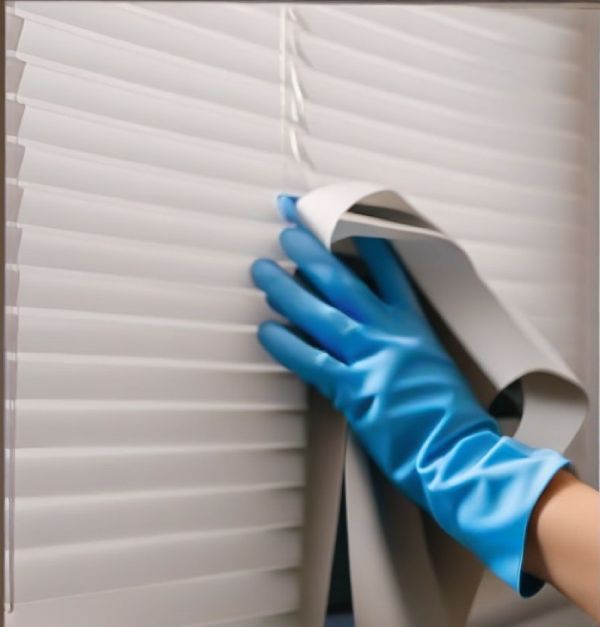
Once removed, take the opportunity to clean both the blinds and the window area. A clean surface ensures smooth reinstallation.
- Carefully remove dust or debris using a soft cloth or gentle brush.
- If the blinds are washable, prepare a cleaning solution according to the instructions provided by the manufacturer or a suitable cleaning agent. Dip a clean cloth into the cleaning solution and gently wipe each blind for thorough cleaning.
- Air-dry thoroughly, then store in a safe, dust-free area to protect from potential damage before reinstallation.
BONUS TIP: Label each piece before reinstalling the blinds. Use a marker or tape to show which side is the top and the direction they face.
A Guide on How to Take Down Blinds of All Types
How to Remove Vertical Blinds?
Vertical blinds are a favored option for big windows or sliding glass doors. Removing them requires the following steps:
1. Gather Your Tools: You will need a screwdriver and a flat-head screwdriver, both household tools.
2. Open the Blinds: Turn the blinds fully open to access the brackets.
3. Locate the Brackets: Look near the top for the brackets holding the blinds.
4. Remove the Brackets: Use the screwdriver to take out the bracket screws. Support the blinds with one hand.
5. Release the Blinds: Gently lift the blinds off the brackets, as they can be heavy.
6. Unhook the Valance: If there is a decorative cover at the top, unhook it carefully.
7. Store Carefully: If you plan to reuse the blinds, find a safe spot to store them.
How to Remove Horizontal Blinds?
Horizontal blinds, commonly known as Venetian blinds, are a classic choice for many homes. Here is how to remove them:
1. Remove the Valance: If your blinds have a valance, start by taking it off.
2. Tilt the Slats: Use the tilt wand or cord to adjust the slats to a fully horizontal position. This makes it easier to lift the blinds.
3. Lift the Blinds: Lift the blinds and tilt them to the open position, providing access to the brackets.
4. Remove the Headrail: Press firmly on one end of the headrail to take down the bracket. Tilt the top bar backward and roll it out of the bracket. Repeat the same process on the opposite side and remove the headrail.
5. Unscrew the Brackets: With the headrail removed, loosen the brackets from the window frame.
6. Release the Blinds: Gently lift the blinds off the brackets. Be cautious, as they might be a bit heavy.
How to Remove Roller Blinds?

Roller blinds are a modern and stylish choice for windows, with a simple design that complements home interiors.To take them down:
1. Open the Roller Blinds: Roll the blinds up to expose the brackets.
2. Locate the Brackets: Look for the brackets at each end of the roller, usually near the top.
3. Apply Lubrication (if needed): If brackets are stubborn, apply lubricant for smoother unscrewing.
4. Remove the Brackets: Unscrew the small brackets holding the loop using a Philips head screwdriver or drill. Support the roller blinds while performing this step.
5. Check for Additional Attachments: After removing the brackets, check for any additional attachments that might be securing the blinds. Some blinds have clips or snaps that need to be released.
6. Release the Roller Blinds: Once the brackets are removed, gently pull the roller blinds out of the brackets.
How to Remove Roman Blinds?

Roman blinds offer a touch of sophistication to any living space. Follow these steps to remove them:
1. Gather Your Tools: Grab a screwdriver and pliers to loosen screws and brackets.
2. Detach the Headrail: Unscrew it from the mounting brackets, supporting the blinds as you do. This step allows for a smooth removal process.
3. Remove Rings or Cords: Gently unthread or unhook any rings or cords attached to the blinds.
4. Unthread from Slats or Dowels: Starting from the bottom, carefully remove the blinds. Ensure to observe how the blinds are attached to the dowels or slats.
5. Inspect for Additional Attachments: Check for any clips, snaps, or additional attachments that may be securing the blinds. Release them gently if needed.
How to Remove Mini Blinds?

Mini blinds are like small, light-blocking curtains with thin slats, shorter than regular blinds. They have a cord or wand to tilt the slats up and down. Great for bathrooms, they give privacy without taking up much space.Follow these steps to take them down:
1. Prepare the Blinds: Tilt the slats horizontally and lift them, gathering all slats at the top.
2. Open the Brackets: Locate the two brackets at each end of the headrail. Lift them open using a flat-head screwdriver.
3. Remove the Headrail: Once the brackets are open, raise the headrail.
4. Take off the Brackets: Use a Philips head drill or screwdriver to unscrew the brackets from the window frame.
How to Remove Motorized Blinds?
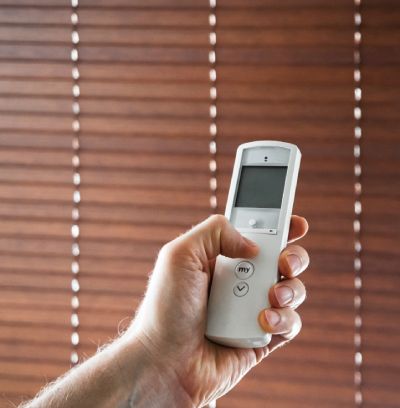
Motorized blinds offer modern luxury, combining convenience with smart home integration. To take them down, follow these simple steps:
1. Open the Blind: Ensure the blind is fully open if the motor is still functional.
2. Disconnect Power: Unplug the blind from its power source or remove the battery, commonly found in the headrail.
3. Locate Spring Clips: Identify the metal spring clips on the backside of the headrail. These secure the headrail to the brackets.
4. Release Headrail: Press the spring clips inward using your fingers or a flathead screwdriver to release the headrail from the brackets.
5. Lift Blinds Out: Raise the blinds out of the brackets, and if necessary, get help, especially with heavy or long blinds
How to Remove Cellular Blinds?
Cellular Blinds, with their honeycomb-shaped fabric, offer adjustable light and privacy. The top-down, bottom-up option makes them excellent for insulating against heat, cold, and outside noise.
To remove them, follow these simple steps:
1. Prepare Blinds: Raise the blinds fully up and lock them in place.
2. Valance Removal: If applicable, remove any valance, cornice board, or cover.
3. Identify and Open Brackets: Locate the raised cubes at each end of the headrail (brackets) and open them based on their type (hinged or sliding).
4. Lift Blinds Out: If you have center brackets, remove them first. Then, gently lift the blinds out of the brackets.
Click to learn how to lower and fix blinds of various types or strings
How to take care of your blinds?
- Regular Dusting: Dust regularly to stop dirt and allergens from building up on your blinds.
- Avoid Harsh Chemicals: Avoid strong chemicals or cleaners when cleaning blinds, as they may harm the material.
- Consider Professional Cleaning: For delicate or valuable blinds, hire a professional cleaning service to ensure proper care.
- Repairing Minor Damages: Address minor damages promptly by straightening bent slats with pliers or replacing damaged parts. Lubricate or replace a malfunctioning tilt mechanism.
- Storage Options for Blinds Not in Use: Store blinds in a clean, dry space such as a closet or storage room when not in use. For larger blinds, explore storage bags or boxes designed for window treatments.
DIY vs. Hiring: Removing Blinds
When deciding between DIY removal or hiring a contractor for blinds, consider factors like budget, project scope, and personal preference.
DIY offers savings and flexibility, but challenges may arise without proper tools or expertise. Hiring a contractor ensures professional handling but involves labor costs and less control over the process.
The overall cost varies based on the number of windows, the type of blinds, and the work’s complexity. Getting multiple quotes helps you compare prices and services effectively.
Troubleshooting Common Issues
During the blind removal process, you may encounter common challenges. Here are some possible solutions:
⇒ If screws are tightly secured, try using a lubricant such as WD-40 to ease their removal.
⇒ If the plastic tabs on the headrail are stubborn, gently open them with a small flat-head screwdriver.
⇒ If blinds are stuck or difficult to detach, apply a small amount of gentle pressure or wiggle them slightly.
By addressing these common issues, you have successfully learned how to take down blinds.
How to replace blinds?
Blinds don’t last forever, and over time, they can get damaged, change color, or wear out. If you’re updating your home or office style, you might want blinds that match the new look. Here’s a simple guide on how to replace them:
Step 1: Prepare the Workspace
Take down the existing blinds by following the instructions provided in the preceding section (A Guide on How to Take Down Blinds)
Step 2: Precisely Align and Install Brackets
Using a pencil, measure the width of the window. Now, hold the brackets against the window or wall, marking the screw holes for a perfect fit for the new blinds.
Step 3: Attach the Brackets
If the new blinds come with mounting brackets, securely attach them to the window frame or wall using screws and a screwdriver. Ensure a tight and stable fit.
Step 4: Reattach the Blinds
Slide the blinds back into the brackets, ensuring they click into place. Double-check for levelness and security.
Step 5: Secure the Blinds (if applicable)
Depending on the type of blinds, there may be additional clips or brackets to secure them in place. Make sure you follow the manufacturer’s instructions here.
Step 6: Test Operation & Clean Up
Raise and lower the blinds to make sure they are functioning smoothly. Afterward, dispose of the packaging and quickly clean the area for a neat and fresh look.
Remember, replacing blinds is a simple way to refresh your space and keep it looking its best.
How to Take Down Blinds FAQs
For blinds with hidden brackets, gently open the bracket covers to access the screws. Unscrew the brackets and lift the blinds off.
Removing blinds without strings is easy. First, lift the blinds fully to avoid accidental damage. If there’s a cover, take it off. Find the raised cubes at each end of the headrail (the brackets) and open them, whether they’re hinged or sliding. If the blinds are heavy or long, get someone to help. Remove any center brackets if there are any. Finally, lift the blinds out of the brackets to complete the removal.
Gently lift the blinds upward to release them from the clips. Now, Slide the blinds out of the clips carefully.
Replace blinds when they are damaged, outdated, or no longer function properly.
If the blinds are stuck, gently tug on the bottom rail while slightly tilting the blinds. If this does not work, refer to specific removal instructions or look for obstructions. Lubricating the moving parts with a silicone-based spray can also help. If needed, seek professional blind repair services for expert assistance.
Always work with care and patience. Apply gentle pressure when unfastening screws or detaching blinds. Use less force to avoid causing damage. If you encounter resistance, reassess the situation and try a different approach.
Keep the Levolor blinds clean right away to prevent dust and dirt from settling. Use a clean cloth or duster to wipe down the blinds. Not only does this ensure a clean surface for reinstallation, but it also keeps them lasting longer.
Final Thoughts on How to Take Down Blinds
Congratulations! You now have a clear understanding of How to Take Down Blinds effectively and safely.
Remember to prepare, assess your blinds for any damages, and follow the blind removal. Now, you can confidently take down and care for your blinds, ensuring they remain in top-notch condition for years.
However, if you ever wonder how to take down blinds, revisit this guide for a smooth and hassle-free experience. Enjoy your decorating or cleaning!

How to take down blinds in which brackets are not visible?
If you can’t see the brackets, check the blinds for small clips, covers, or hidden buttons. These things might be hiding where the blinds are attached. Look for any way to open or move the blinds.
While removing my blinds, can I use super power drill to remove screws on my wall? Please reply
Yes, you can use a power drill to remove screws while taking down blinds. Just be careful and control the drill to avoid any damage. If you’re unsure, consider asking for help or using a manual screwdriver.
nice: the guide was helpful!
The article helped me to take down blinds, I was confused earlier. But the guide made it easy!