 Skip to content
When it comes to adding a finishing touch to your home, curtains play a crucial role. They not only provide privacy but also enhance the overall aesthetic appeal of a room. However, what if you find yourself without a curtain rod? worry not, for we have put together a complete guide on how to hang curtains without a rod. Let us dive in!
TABLE OF CONTENTS
ToggleHOW TO HANG CURTAINS WITHOUT A ROD?
1
Tension Rods: A Quick Fix
Using tension rods is a quick, versatile, and damage-free method for hanging curtains. It allows you to change your window decor easily and is especially useful for those who prefer a temporary solution. They can be easily adjusted to fit various window sizes. Simply twist and lock them into place. Position the tension rod inside your window frame and hang your curtains using the rod pockets or clips.
Here is a step-by-step guide depicting how to hang curtains without a rod.
Supplies
- Tension Rod
- Curtains
- Curtain Rings (Optional)
- Measuring tape
Step 1: Measure Your Window
Start by measuring the width of your window frame where you want to hang the curtains. Ensure that you measure accurately to choose the right-sized tension rod. The rod should be slightly shorter than the window width for a secure fit.
Step 2: Adjust the Tension Rod
Take your tension rod and twist it to shorten its length. This will make it easier to fit it into the window frame.
Step 3: Position the Tension Rod
Now, position the tension rod inside your window frame. Place it at the desired height for your curtains. The rod should press firmly against the frame on either side.
Step 4: Extend the Tension Rod
Slowly extend the tension rod by twisting it counterclockwise. This action will create tension, pushing the rod against the window frame on both sides. Keep extending until the rod feels secure and does not slip.
Step 5: Hang Your Curtains
If your curtains have rod pockets, simply slide them onto the tension rod. Ensure that the curtain fabric is evenly distributed along the rod for a neat appearance.
Step 6: Adjust and Level
Take a step back and ensure that the curtains are hanging straight and at your desired height. Make any necessary adjustments to the rod’s position or curtain placement to achieve the perfect look.
Step 7: Finishing Touches
If you are using curtain rings, thread them through the grommets on your curtains and then hang them on the tension rod. This adds a decorative touch and ensures your curtains hang evenly.
2
Command Hooks: Practical and Damage-Free
Command hooks are a practical and versatile option for hanging curtains. Further, they leave no lasting marks on your walls. Whether you want to add privacy to a room or enhance its decor, command hooks will do so with ease and style. It is one of the easiest ways of displaying (how to hang curtains without a rod) creatively.
These hooks come in various sizes and can hold a surprising amount of weight. Install them on either side of your window and thread the curtain through the hooks. Voila! Your curtains are elegantly in place.
Here is a step-by-step guide depicting how to hang curtains without a rod.
Supplies
- Command Hooks
- Curtains
- Curtain Rings (Optional)
- Level (Optional)
Step 1: Measure and Mark
Start by measuring the desired height for your curtains and mark the spots where you will place the command hooks. It is essential to measure accurately to achieve a balanced and aesthetically pleasing look.
Step 2: Clean the Surface
Clean the area where you intend to attach the command hooks. Wipe away any dust or debris, and make sure the surface is dry. A clean surface ensures a strong bond with the adhesive strips.
Step 3: Attach the Command Hooks
Remove the backing from the adhesive side of the command hooks. Then, firmly press the hooks onto the marked spots on your wall, ensuring they are level if needed. Hold them in place for about 30 seconds to allow the adhesive to bond securely.
Step 4: Wait for gluing Activation
Most command hooks come with sticky strips that require some time to activate fully. Refer to the instructions on the packaging for the recommended wait time. Typically, it is best to wait for about an hour before proceeding to the next step.
Step 5: Hang Your Curtains
Once the gluing is fully activated, you can hang your curtains. If your curtains have grommets or loops, thread them through the hooks. If you prefer to use curtain rings for added style, attach them to the command hooks and then hang your curtains from the rings.
3
PVC Pipes: Sturdy and Cost-Effective
If you are looking for a cheap alternative, consider using PVC pipes. Using PVC pipes as curtain rods is a practical choice, especially for larger or uniquely-sized windows. It is a DIY-friendly option that can add a touch of creativity to your home decor.
Cut the pipe to the desired length and attach end caps. Mount it above your window, and slide your curtains onto the pipe. This creates a simple yet effective curtain rod substitute.
Here is a step-by-step analysis showing how to hang curtains without a rod.
Supplies
- PVC Pipe
- PVC End Caps
- PVC Cement (Optional)
- Mounting Brackets
- Screws and Anchors
- Curtains
- saw
Step 1: Measure and Cut
Measure the width of your window accurately. Using a saw, cut the PVC pipe to match this measurement. If you are unsure about the length, it’s always better to start longer and trim it down if needed.
Step 2: Attach the End Caps (Optional)
If you want to create a more finished look, attach the PVC end caps to both ends of the pipe. Apply PVC cement to the inside of the end cap and push it onto the ends of the pipe.
Step 3: Install Mounting Brackets
Position the mounting brackets on the wall where you want to hang the PVC pipe.
Step 4: Attach the Brackets
Using appropriate screws and anchors, secure the mounting brackets to the wall. Make sure they are firmly attached and can support the weight of the PVC pipe and curtains.
Step 5: Insert the PVC Pipe
Slide the PVC pipe through the curtain’s grommets, tabs, or loops. Ensure that the pipe is evenly distributed along the width of the curtains.
Step 6: Place the PVC Pipe on the Brackets
Position the PVC pipe onto the installed mounting brackets. Make sure it rests securely on the brackets and is level.
Step 7: Adjust and Level
Step back and ensure that the curtains are hanging straight and at your desired height. Make any necessary adjustments to the PVC pipe’s position or curtain placement to achieve the perfect look.
4
Copper Pipes: A Stylish Touch
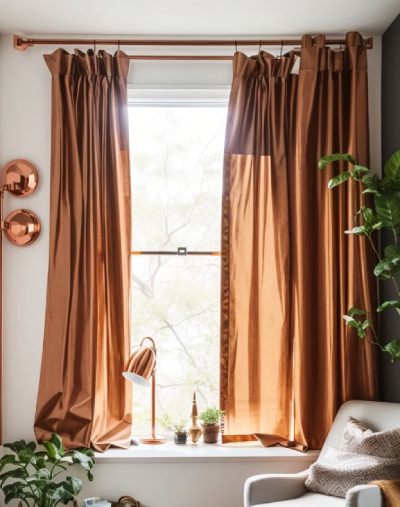
For a touch of elegance, opt for copper pipes. They add a chic, industrial look to your space. Choose a pipe that fits your window width, secure brackets on either side, and hang your curtains with curtain rings. The result is a sophisticated and unique curtain-hanging solution.
Here is a step-by-step analysis showing how to hang curtains without a rod.
Supplies
- Copper Pipe
- Copper Pipe Brackets
- Screws and Anchors
- Curtains
- Curtain Rings (Optional)
- hacksaw
Step 1: Measure and Cut the Copper Pipe
Measure the width of your window accurately. Using a pipe cutter or a hacksaw, cut the copper pipe to match this measurement. Make sure to cut it cleanly for a polished look.
Step 2: Install Copper Pipe Brackets
Position the copper pipe brackets on the wall where you want to hang the copper pipe.
Step 3: Attach the Brackets
Using appropriate screws and anchors, secure the copper pipe brackets to the wall. Ensure they are firmly attached and can support the weight of the copper pipe and curtains.
Step 4: Insert the Copper Pipe
Slide the copper pipe through the curtain’s grommets or loops. Ensure that the pipe is evenly distributed along the width of the curtains.
Step 5: Optional – Add Curtain Rings
If you are using curtain rings for a decorative touch, attach them to the copper pipe. Thread them through the grommets on your curtains, then hang them on the copper pipe.
5
Knobs and Brackets: A Decorative Twist
Decorative knobs and brackets can serve as both functional and aesthetic alternatives to curtain rods. Install them on each side of your window and use them as anchors for your curtain ties or clips. This not only holds your curtains in place but also adds a decorative touch to your window treatments.
Here is a step-by-step analysis showing how to hang curtains without a rod.
SUPPLIES
- Decorative Knobs
- Brackets
- Screws and Anchors
- Curtains
- Marker
- Measuring tape
- level
Step 1: Measure and Mark
Determine the desired height for your curtains and mark the spots where you will attach the brackets. Ensure the marks are level if you are using multiple sets.
Step 2: Install Brackets
Position the brackets on the wall where you want to hang the curtains.
Step 3: Attach the Brackets
Using appropriate screws and anchors, secure the brackets to the wall. Make sure they are firmly attached and can support the weight of the curtains.
Step 4: Attach Knobs
Screw the decorative knobs onto the front of the brackets. Ensure they are securely fastened and positioned at the desired height for your curtains.
Step 5: Insert the Curtain
Slide the curtain through the grommets or loops, ensuring that the fabric is evenly distributed along the width of the curtain.
Step 6: Hang the Curtain
With the curtain in place, lift it up and hook the grommets or loops onto the knobs. Ensure they are secure before letting go.
6
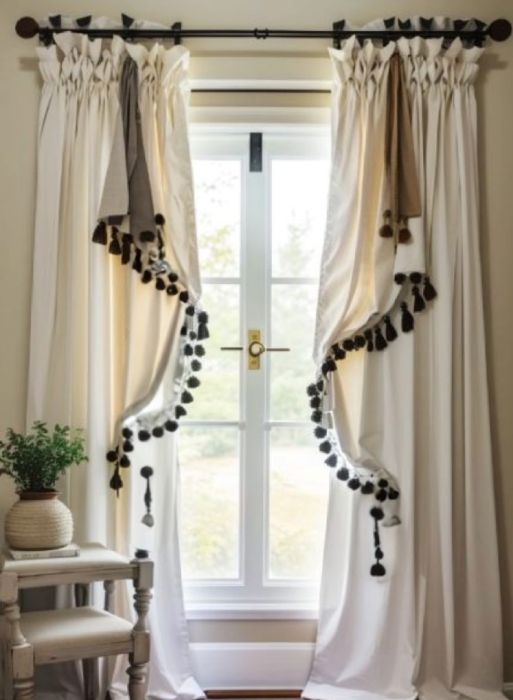
Rope or Twine: Rustic Charm
For a charming, rustic look, consider using rope or twine to hang your curtains. Attach eye hooks to the wall or window frame, then thread the rope through the curtain’s grommets or tabs. Knot the ends securely, allowing the curtain to drape naturally. This approach provides a unique and visually appealing way of showing how to hang curtains without a rod.
Supplies
- Rope or Twine
- Eye Hooks
- Curtains
- Screws and Anchors
Step 1: Measure and Mark
Determine the desired height for your curtains and mark the spots where you will attach the eye hooks. Ensure the marks are level if you are using multiple sets.
Step 2: Install Eye Hooks
Position the eye hooks on the wall where you want to hang the curtains. Mark the locations of the screw holes.
Step 3: Attach the Eye Hooks
Using appropriate screws and anchors, secure the eye hooks to the wall. Make sure they are firmly attached and can support the weight of the rope or twine and curtains.
Step 4: Cut and Prepare the Rope or Twine
Cut the rope or twine to the desired length, allowing for some extra length to create a swag or drape effect. If using multiple ropes, ensure they are all the same length.
Step 5: Thread the Rope or Twine
Thread the rope or twine through the grommets, loops, or tabs of the curtain. Ensure that the rope is evenly distributed along the width of the curtain.
Step 6: Anchor the Rope or Twine
Starting at one end, loop the rope or twine through the first eye hook. Continue to loop it through each subsequent hook, ensuring that it is taut but not overly stretched.
Step 7: Secure the Ends
Once you are satisfied with the arrangement, secure the loose ends of the rope or twine. You can tie knots or use decorative knots for added flair.
Step 8: Adjust and Level
Step back and ensure that the curtains are hanging straight and at your desired height. Make any necessary adjustments to the rope or twine’s position or curtain placement to achieve the perfect look
7
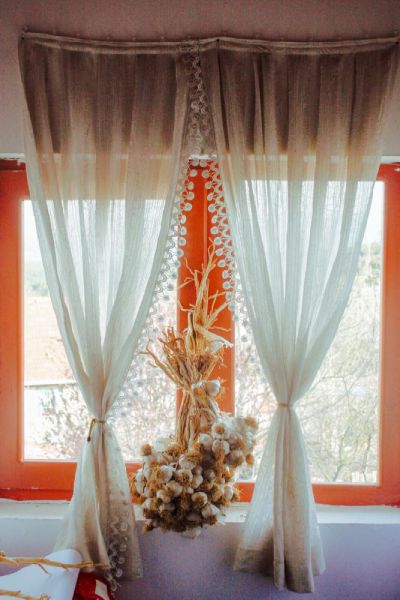
Ribbon or Fabric Strips: Creative and fun
Ribbon or Fabric Strips: Creative and fun
Ribbons or fabric strips can add a fun touch to your curtain display. Cut them to the desired length, attach them to the top of your curtain, and tie them to hooks or nails secured above your window. This creates a playful and creative curtain-hanging solution.
Supplies
- Ribbon or Fabric Strips
- Hooks or Nails
- Curtains
- Scissors
- Marker
Step 1: Measure and Mark
Determine the desired height for your curtains and mark the spots where you will attach the hooks or nails. Ensure the marks are level if you are using multiple sets.
Step 2: Install Hooks or Nails
Position the hooks or nails on the wall where you want to hang the curtains. Mark the locations of the screw holes.
Step 3: Attach the Hooks or Nails
Use correct screws and anchors, and pin the hooks or nails to the wall. Make sure they are firmly attached and can support the weight of the ribbons or fabric strips and curtains.
Step 4: Cut and Prepare the Ribbons or Fabric Strips
Cut the ribbons or fabric strips to the desired length, allowing for some extra length to create a swag or drape effect. If using multiple pieces, ensure they are all the same length.
Step 5: Thread the Ribbons or Strips
Thread the ribbons or fabric strips through the grommets, loops, or tabs of the curtain. Ensure that they are evenly distributed along the width of the curtain.
Step 6: Anchor the Ribbons or Strips
Starting at one end, loop the ribbons or fabric strips through the first hook or nail. Continue to loop them through each subsequent hook or nail, ensuring that they are taut but not overly stretched.
Step 7: Secure the Ends
Once you are satisfied with the arrangement, secure the loose ends of the ribbons or fabric strips. You can tie knots or use decorative knots for added flair.
Also learn How to clean and wash curtains (Read more)
How to Wash Curtains
How to Wash Blackout Curtains
How to clean sheer curtains
CONCLUSION:
Hence, we have discussed creative ways depicting how to hang curtains without a rod. By exploring these options, you can achieve a unique look for your window treatments. Experiment with different materials and styles to find the perfect fit for your space.Lastly, we hope to have provided you with the right insight regarding how to hang curtains without a rod.
